Assistant Setup Guide
What is an Assistant?
A DataQI assistant is a tailored AI interface trained to understand and respond using your internal content. Assistants can be built to answer questions, create documents, or help retrieve information from connected files.
When to Create a New Assistant
- You have a specific audience (e.g. HR, Legal, Ops)
- You want to use different data sources or templates
- You need a different tone, language style, or purpose
- You want to limit access to a defined group of users
Setup Steps
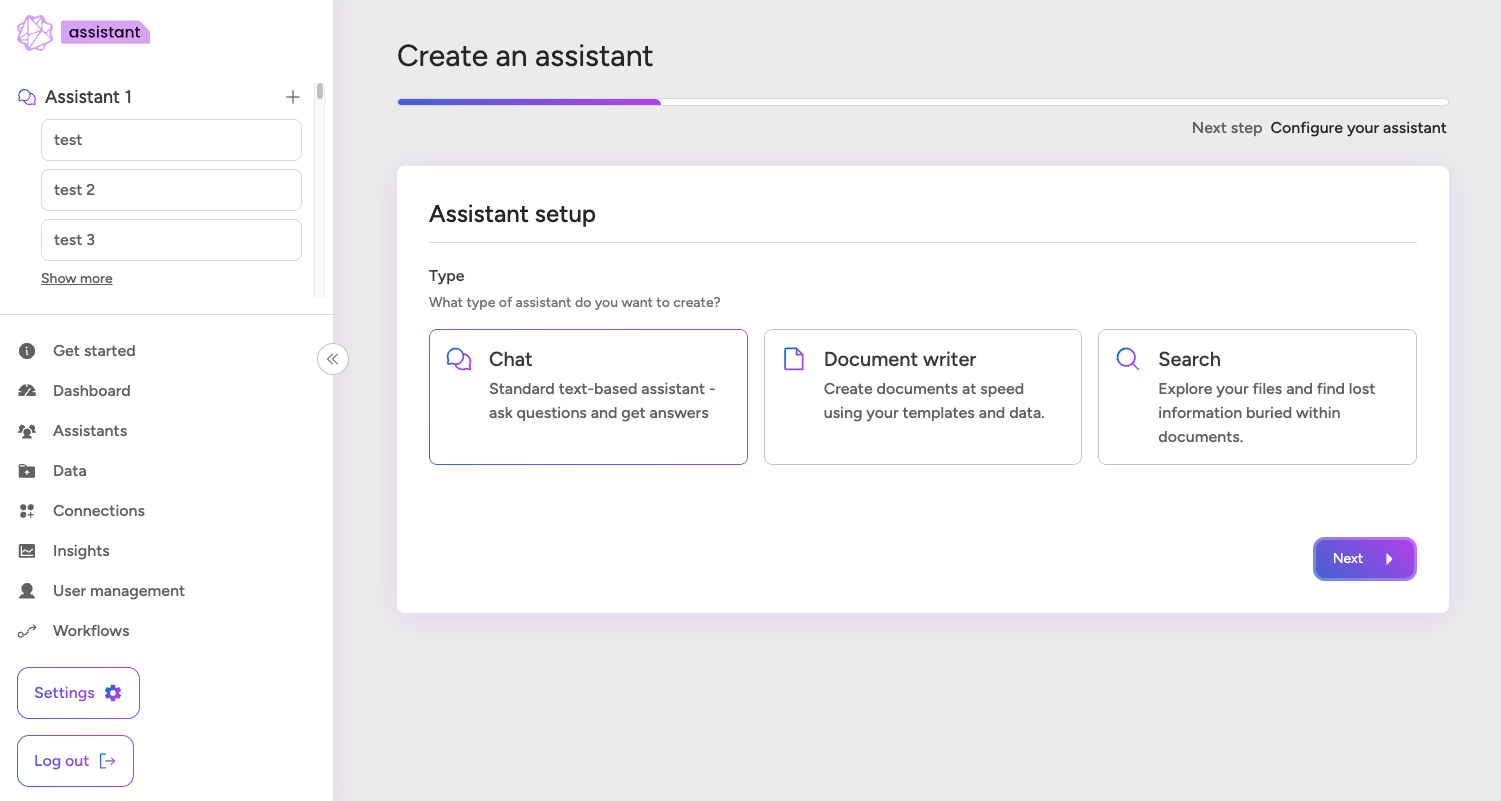
1. Choose Assistant Type
Select from:
- Chat - for natural language Q&A
- Document Writer - to generate structured outputs
- Search - for searching and retrieving documents
2. Name Your Assistant
Give your assistant a clear, descriptive name. This helps users know what it’s for (e.g. “HR Policy Chat”, “Sales Proposal Writer”).
3. Model Selection
If your plan includes access to multiple AI models, you’ll see an option to choose a model during assistant creation. Select the model that best fits your task:
- Use lighter, faster models for quick summarisation or general responses
- Choose higher-accuracy models for legal, policy, or high-stakes content
Your admin team can advise on model availability and usage based on your licence tier.
4. Use Existing Data Sources
Before creating your assistant, ensure your content has been connected to DataQI:
- Upload documents (PDF, Word, TXT, Markdown)
- Link folders from SharePoint or Google Drive
- Add public content via web scraping
- Connect SQL databases (Microsoft SQL, PostgreSQL, MySQL) for real-time data querying
Once data is connected, you can assign it to an assistant during setup.
5. Configure Assistant Settings
Use the unified Configuration page to customize your assistant’s behavior and capabilities:
- Assistant Name - Clear, descriptive name for easy identification
- Description - Define the assistant’s role and purpose to improve context and response accuracy
- Instructions (Optional) - Add specific rules or behaviors (e.g., “Always cite sources when providing information”)
- Tone of Voice (Optional) - Choose the communication style (Professional, Friendly, Technical, or Concise)
- AI Model - Select the underlying model powering your assistant
- Configure Knowledge Mode - Choose whether to use only your private data or include global knowledge
- Enable Hallucination Guardrail - Add safety measures to flag potentially inaccurate responses
- Set up Intent Detection - Allow the assistant to automatically detect when to query live data sources
6. Upload Templates (if applicable)
If you’re creating a Document Writer, upload your .doc, .docx, .txt, or .pdf templates. These will define the output format.
7. Test Your Configuration
Before sharing your assistant, test its capabilities:
- Ask sample questions to verify it uses the right data sources
- Test SQL connections with data-related queries (if applicable)
- Verify Knowledge Mode behavior matches your expectations
- Check Hallucination Guardrail warnings appear when appropriate
8. Share Access
Use the Privacy tab to share with users or groups:
- View access - to use the assistant
- Edit access - to change its configuration or content
Best Practices
- Create focused assistants (e.g. one per department or process)
- Use consistent naming conventions
- Keep prompts short and specific
- Configure appropriate Knowledge Mode for your use case
- Enable safety features like Hallucination Guardrail for high-stakes content
- Test thoroughly before sharing with users
- Review feedback regularly to improve responses
Advanced Features
For more detailed information on the new features:
- SQL Connections - Connect to databases with automatic intent detection
- Knowledge Mode - Control data source usage
- Hallucination Guardrail - Safety and accuracy features
Who Can Create Assistants
Only users with the relevant permissions (as assigned by your admin team) can create or configure new assistants. If you’re unsure, contact your organisation’s platform administrator.